

How To Search For Wifi Windows 10
A Wi-Fi adapter makes it user-friendly to connect your Windows 10 laptop or desktop to the network and internet without dealing with cables. All the same, it's only convenient as long as you know where to find the settings to connect.
Whether you lot're setting up a device for the first time, connecting in a new identify, or if you lot're looking for an efficient method to connect multiple devices to the aforementioned network, Windows 10 offers various ways to connect to the internet using a Wi-Fi connection quickly.
In this Windows 10 guide, nosotros walk you through the steps to connect to a Wi-Fi network using the network flyout in Taskbar, Settings, Control Console and using control lines with Control Prompt.
- How to connect to Wi-Fi network using Taskbar
- How to connect to Wi-Fi network using Settings
- How to connect to Wi-Fi network using Control Console
- How to connect to Wi-Fi network using Command Prompt
How to connect to Wi-Fi network using Taskbar
To connect to a Wi-Fi network through the taskbar, apply these steps:
- Click the Network icon in the bottom-right corner of the taskbar.Quick note: Alternatively, you can open Action Middle (Windows key + A), and then click the Network button in the Quick actions section to access the network flyout. If yous don't see the push, click the up pointer button on the left.
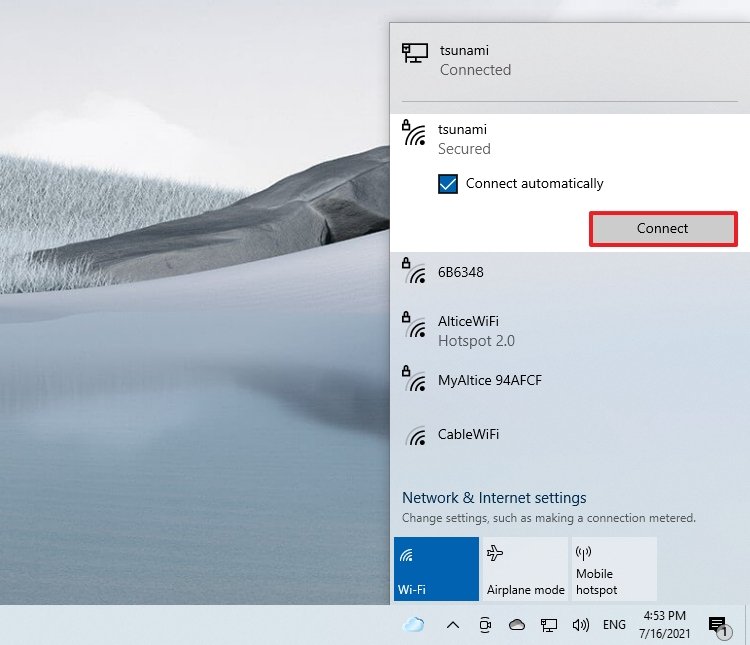
- Select the wireless network to connect.
- (Optional) Check the Connect automatically selection.
- Click the Connect button.Quick tip: If you exercise non meet any wireless admission point in the list, click the Wi-Fi button to plough on the adapter.
- Confirm the network security cardinal (password).

- Click the Next button.
- Confirm whether the device should be discoverable in the network past other PCs.
In one case y'all complete the steps, the laptop volition connect to the network using the Wi-Fi connection.
Reconnect automatically
In addition, Windows 10 besides offers an option to reconnect the device automatically afterward disconnecting the adapter manually.
To prepare the Wi-Fi adapter to reconnect automatically on Windows 10, use these steps:
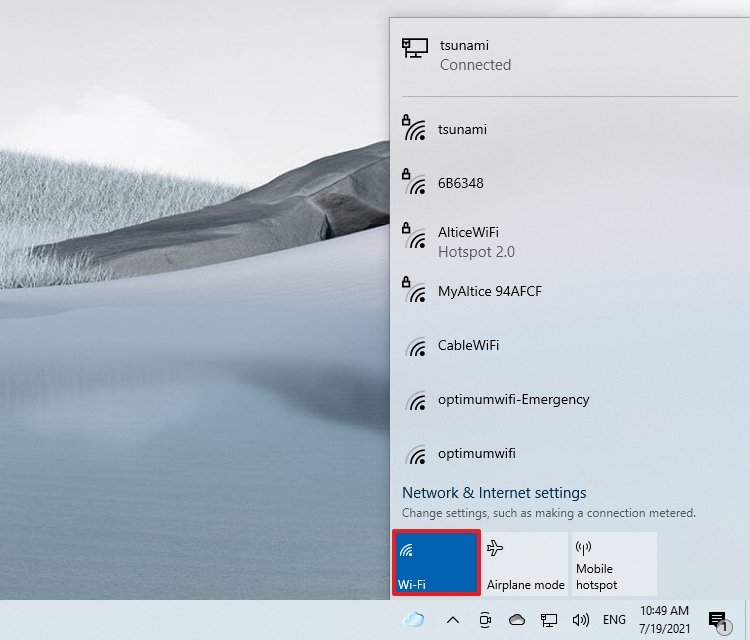
- Click the network icon in the system tray.
- Click the Wi-Fi push to turn off wireless connectivity.
- Use the driblet-down menu and select when to re-connect automatically:
- Manually.
- In one hour.
- In 4 hours.
- In i day.
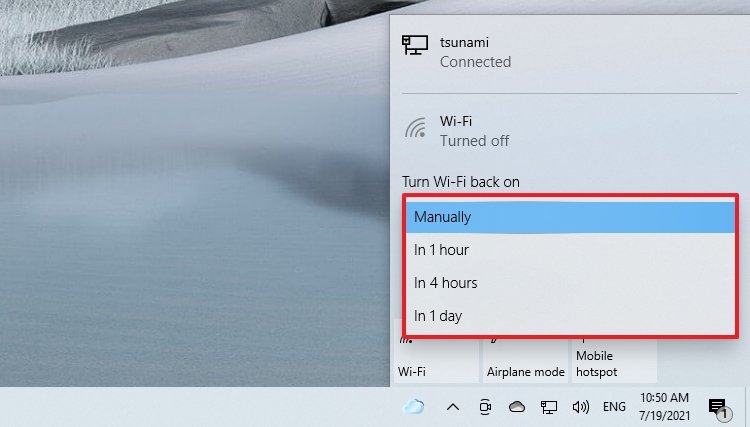
After you complete the steps, Windows 10 won't try to connect to a wireless connectedness until the fourth dimension y'all selected. When using this functionality, the device will merely connect automatically to the networks you have continued to in the past.
How to connect to Wi-Fi network using Settings
Using "Network & Security" settings, you can also add wireless connections manually, and then when the network is in range, the device will connect automatically.
To prevision a Wi-Fi connectedness on Windows 10, utilize these steps:
- Open up Settings.
- Click on Network & Security.
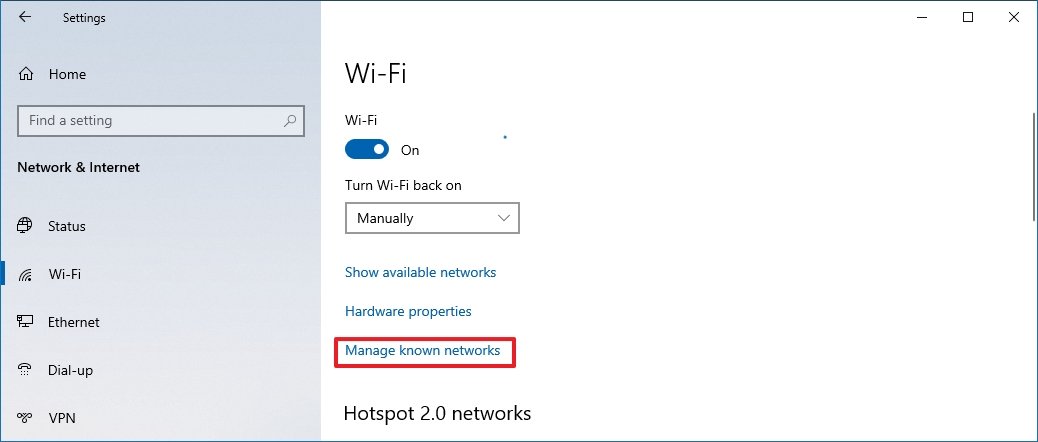
- Click on Wi-Fi.
- Click the Manage known networks choice.
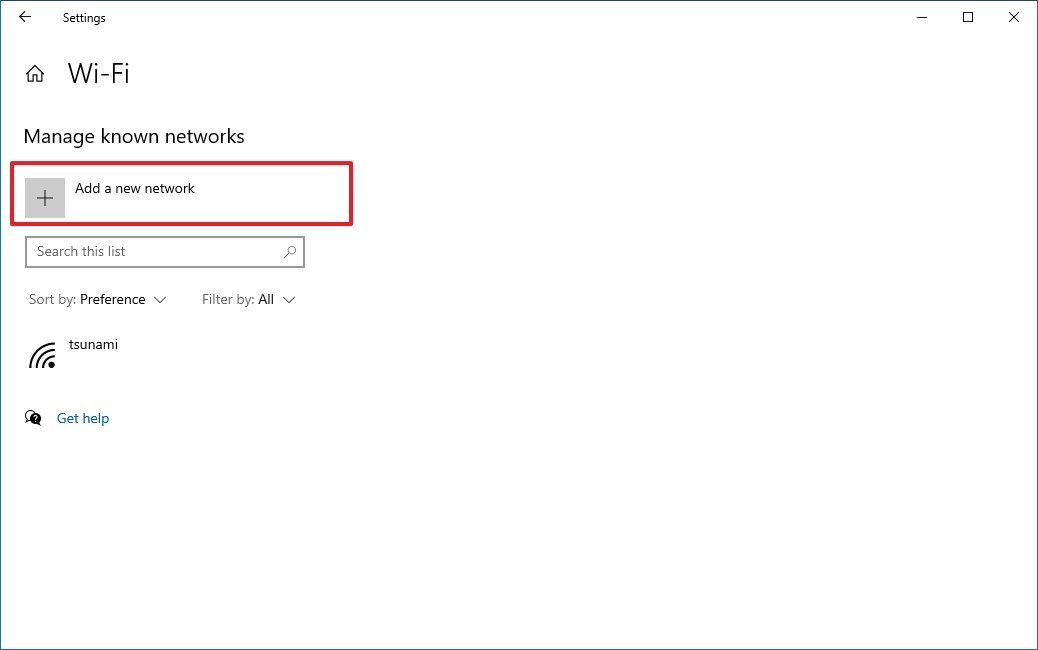
- Click the Add a new network button.
- Ostend the name of the network.
- Use the drop-down bill of fare to select the Security type – For example, WPA2-Personal AES.
- Confirm the network security key (countersign).

- Check the Connect automatically choice.
- Check the Connect even if this network is not broadcasting option (if required).
- Click the Save button.
One time you lot complete the steps, the device will connect automatically when the wireless network is in range.
How to connect to Wi-Fi network using Command Panel
To connect to a Wi-Fi network with Control Panel, use these steps:
- Open up Control Panel.
- Click on Network and Cyberspace.
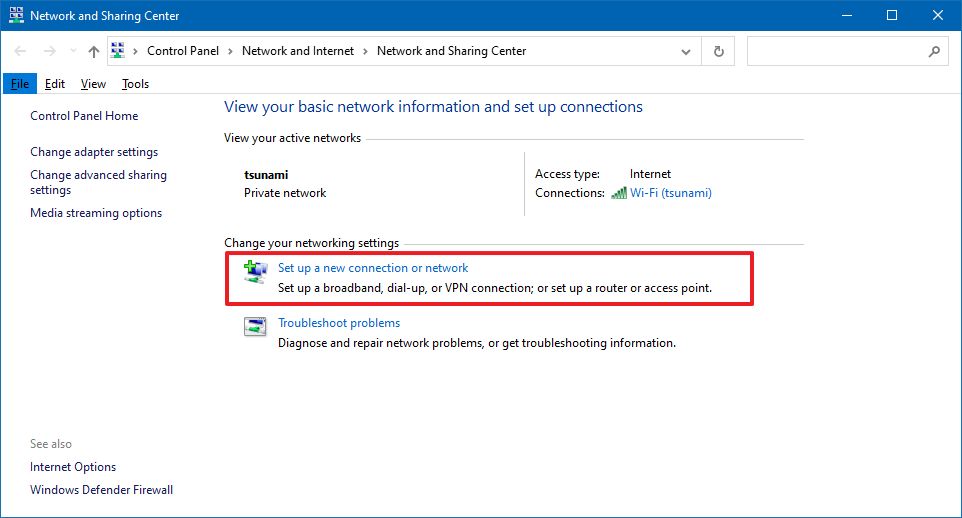
- Click on Network and Sharing Centre.
- Under the "Change your networking settings" section, click the Prepare up a new connection or network selection.
- Select the Manually connect to a wireless network pick.
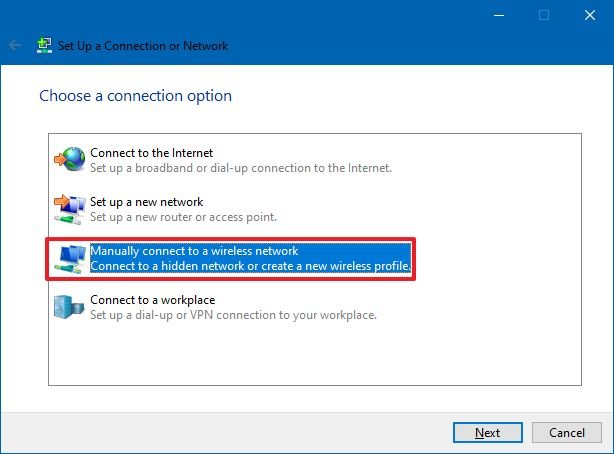
- Click the Next push.
- Confirm the network name.
- Utilise the drop-down menu to select the Security type — for example, WPA2-Personal.
- Confirm the network security cardinal (password).
- Check the Start this connection automatically option.
- (Optional) Cheque the Connect fifty-fifty if the network is not dissemination option.
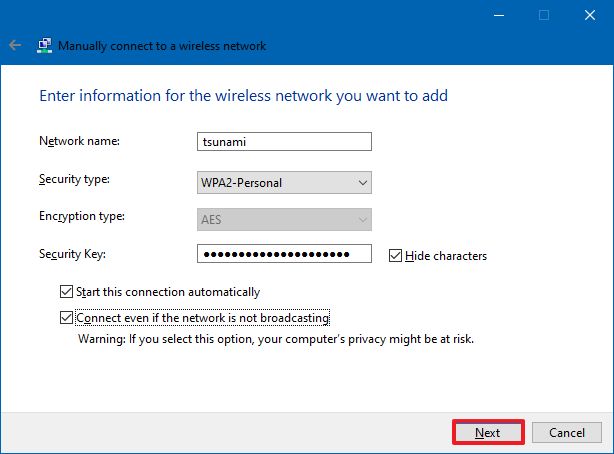
- Click the Next button.
- Click the Close push button.
In one case you complete the steps, the laptop, tablet, or desktop will automatically connect to the Wi-Fi network.
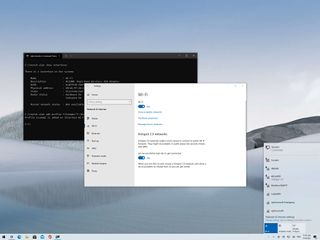
How to connect to Wi-Fi network using Command Prompt
Alternatively, you can also use the netsh command-line tool in Control Prompt to connect to a Wi-Fi network.
To connect to a Wi-Fi admission signal with commands, use these steps:
- Open Get-go.
- Search for Command Prompt, correct-click the top result, and select the Run as administrator option.
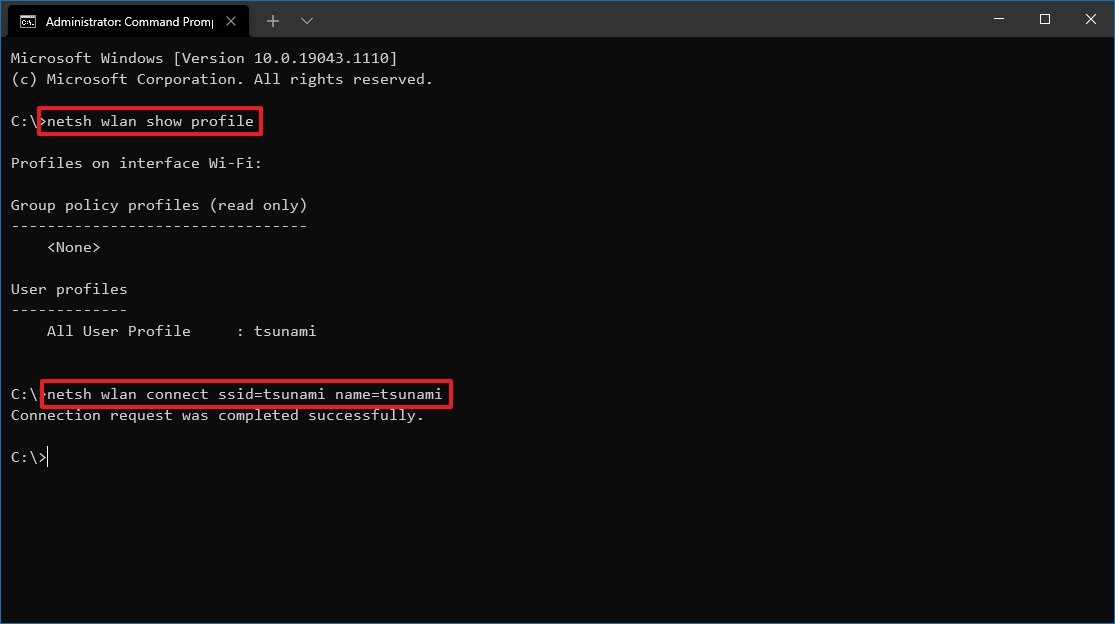
- Blazon the following command to view the bachelor network profiles and press Enter:
netsh wlan testify profile - Confirm the Wi-Fi network contour with your preferred settings.
- Type the following command to connect to the wireless network on Windows x and press Enter:
netsh wlan connect ssid=YOUR-WIFI-SSID name=Profile-NAMEIn the control, call back to specify the name (SSID) of the network and profile proper name with your network settings.For example, this command connects to the "tsunami" network using the "tsunami" profile:netsh wlan connect ssid=tsunami name=tsunamiQuick Tip: On devices with more than one wireless adapter, yous must also specify in the command which adapter yous want to use. For instance,:netsh wlan connect ssid=YOUR-WIFI-SSID name=PROFILE-Proper noun interface=Wi-Fi.
After you complete the steps, the device will connect to the wireless network.
New network connection
The netsh tool also lets you manage Wi-Fi adapters and networks. The merely caveat is that you can simply manage previously known networks since you cannot create new network profiles with this tool
When you lot need to use Control Prompt to connect one or multiple computers to the aforementioned wireless network, you tin export the network profile created automatically during the first connexion. And so you tin can import it using the netsh tool to connect using the command-line tool.
Export Wi-Fi contour
To export a Wi-Fi profile with commands, employ these steps:
- Open up Start.
- Search for Command Prompt, right-click the top outcome, and select the Run as administrator option.
- Blazon the following control to view the available network profiles and printing Enter:
netsh wlan show profile - Type the following command to export a profile and press Enter:
netsh wlan export profile Contour-NAME primal=clear folder=PATH\TO\EXPORT\FolderFor example, this command exports the seismic sea wave profile to the "Documents" folder.netsh wlan export profile seismic sea wave primal=clear folder=C:\Users\m\Documents
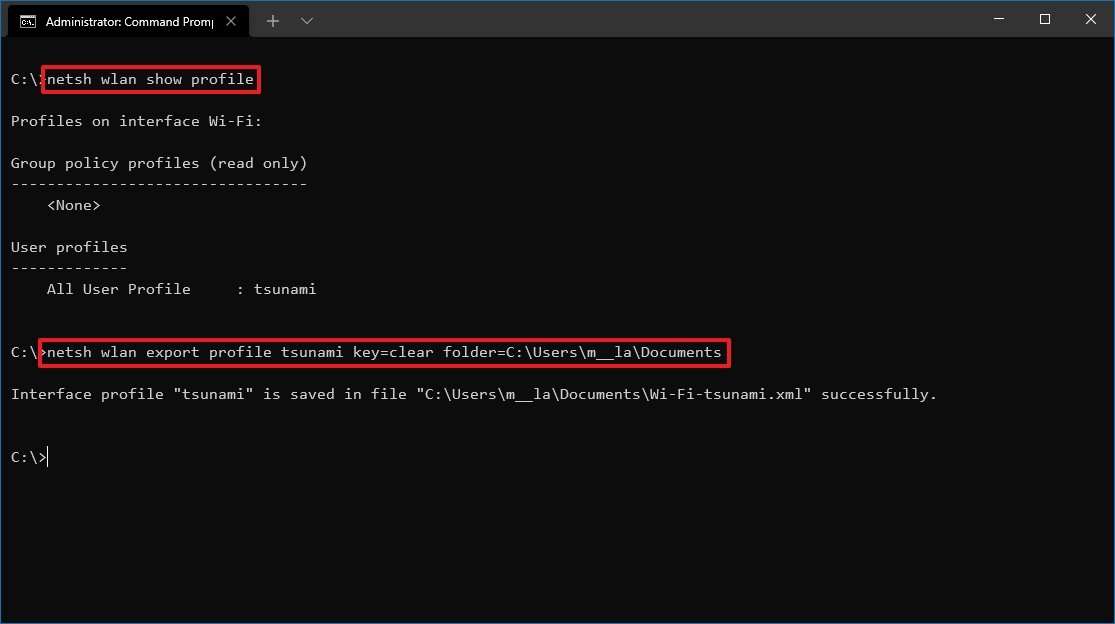
In one case you complete the steps, you can import the same XML file to connect other devices to the aforementioned network.
Import Wi-Fi profile
To import a Wi-Fi profile on Windows ten, use these steps:
- Open Commencement.
- Search for Command Prompt, correct-click the elevation consequence, and select the Run as administrator selection.
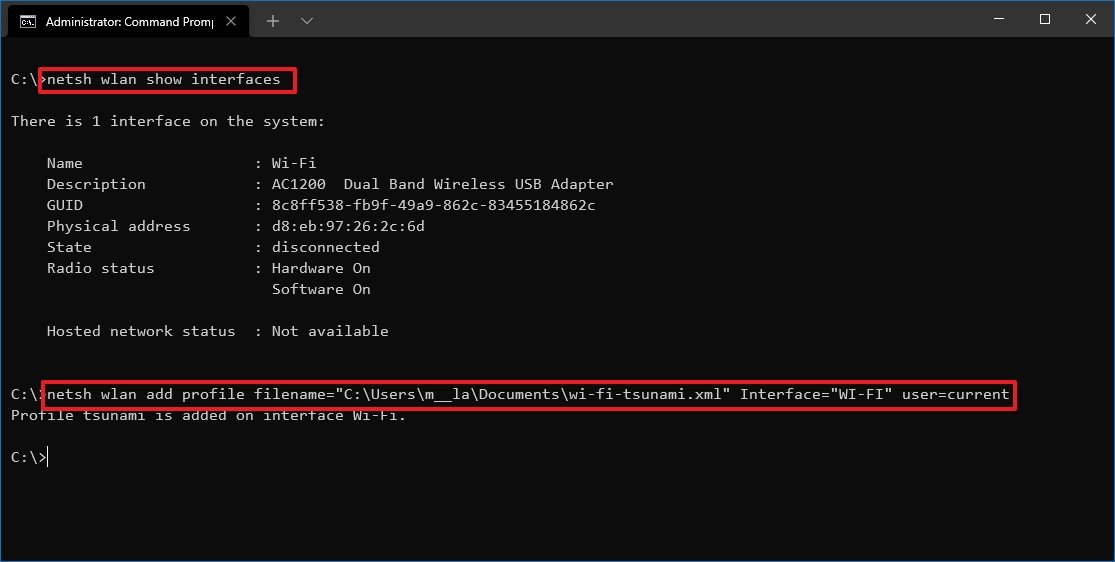
- Type the following control to determine the proper name of the network adapter and press Enter:
netsh wlan show interfaces - Confirm the name of the adapter that volition connect to the network.
- Type the following command to import the network contour and press Enter:
netsh wlan add together contour filename="PATH\TO\PROFILE.XML" Interface="YOUR-WIFI-ADAPTER-Proper name" user=currentIn the control, brand sure to specify the location of the XML file and network interface name.For example, this command imports the xml contour located in the "Documents" folder to the Wi-Fi adapter:netsh wlan add contour filename="C:\Users\1000\Documents\wi-fi-tsunami.xml" Interface="WI-FI" user=current
- Type the following command to connect to the wireless network and press Enter:
netsh wlan connect ssid=YOUR-WIFI-SSID name=PROFILE-NAMEIn the command, specify the SSID and profile proper name that corresponds to your network.For example, this control connects to an access point using the "seismic sea wave" SSID and "seismic sea wave" profile proper name:netsh wlan connect ssid=tsunami name=seismic sea waveQuick tip: If you have multiple wireless interfaces, you lot must also specify in the command which adapter y'all want to use. For example,netsh wlan connect ssid=YOUR-WIFI-SSID proper name=Profile-NAME interface=Wi-Fi.
Afterwards you complete the steps, the computer should connect to the wireless network automatically.
More than Windows resource
For more helpful articles, coverage, and answers to mutual questions near Windows 10 and Windows xi, visit the following resource:
- Windows x on Windows Central — All you demand to know
- Windows x help, tips, and tricks
- Windows 11 on Windows Cardinal — All yous need to know
Source: https://www.windowscentral.com/how-connect-wi-fi-network-windows-10
Posted by: hancehoweenton.blogspot.com
0 Response to "How To Search For Wifi Windows 10"
Post a Comment